The article shows how to make the original image has a retro style.
Two steps need to be done.
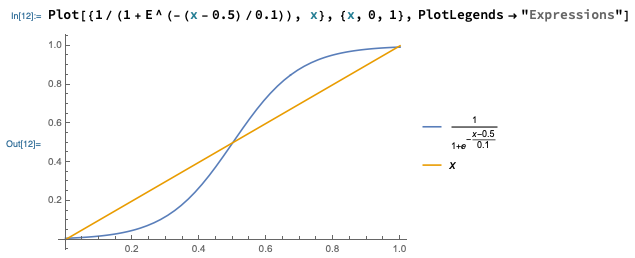
Change the red color channel of the original image.
Change the brightness by a filled circle.
The mathematical function used in step1 makes the brighter pixel brighter, darker pixel darker.
![]()
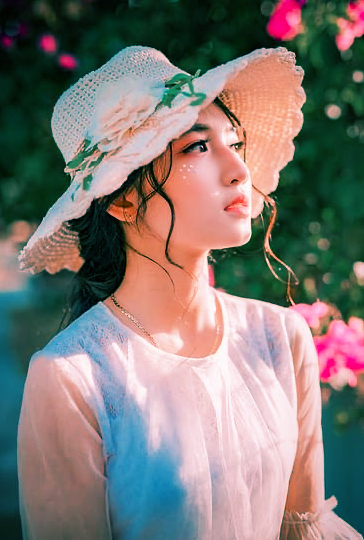
We have to create a mask image to control the brightness of the new picture.
All implementation details are here.
#include <stdio.h>
#include <opencv2/opencv.hpp>
#include <vector>

using namespace cv;

Mat image;
void lomo()
{
    Mat result;
    const double exponential_e = std::exp( 1.0 );
    Mat lut( 1, 256, CV_8UC1 );
    for( int i = 0; i < 256; ++i )
    {
        float x = (float) i / 256.0;
        lut.at<uchar>( i ) = cvRound( 256*( 1 / ( 1 + pow(exponential_e, -(x-0.5) / 0.1 ) ) ) );
    }

    // split image channels and apply curve transform to red channel.
    std::vector<Mat> bgr;
    split( image, bgr );
    LUT( bgr[2], lut, bgr[2] );

    merge( bgr, result );

    Mat halo( image.rows, image.cols, CV_32FC3, Scalar(0.3, 0.3, 0.3) );
    circle( halo, Point( image.cols/2, image.rows/2 ), image.cols / 3, Scalar(1, 1, 1), -1 ); // draw a filled circle
    blur( halo, halo, Size( image.cols/3, image.cols/3 ) );

    Mat resultf;
    result.convertTo( resultf, CV_32FC3 );
    multiply( resultf, halo, resultf );

    resultf.convertTo( result, CV_8UC3 );

    imshow( "result", result );
}

int main(int argc, char** argv )
{
    image = imread( "/Users/weiyang/Desktop/test.png", IMREAD_COLOR );
    if ( !image.data )
    {
        printf("No image data \n");
        return -1;
    }

    lomo();

    // break when press ESC
    while( 27 != waitKey(0) ) {  }

    return 0;
}

